DIY Pinecone Gnomes
In today'due south post: Learn how to make adorable pinecones gnomes to use every bit Christmas ornaments or decorations. This is an piece of cake Christmas arts and crafts that but takes a few supplies.

Gnomes take become i of the nearly popular Christmas decorations! Today'southward DIY pinecone gnomes are a fun way to bring a natural element into your Christmas decorating. They look great on a drape, in a centerpiece, or even hung on your Christmas tree. Their hats are fabricated from felt, which you lot tin can observe in just about any colour, so you can use this tutorial to brand gnomes that perfectly friction match the rest of your Christmas decor.

Notation: want to make some other adorable gnome? Acquire how to brand sock gnomes here
Supplies
Here's what yous'll need to put together this elementary Christmas craft:
- Pinecones: You tin can purchase pinecones from the craft store (the ones that odour similar cinnamon would be fun to employ!) OR collect your own from under trees. If you collect pinecones, you may want to bake them to become rid of whatever bugs. Visit this post to learn more: how to broil pinecones
- Felt: Inexpensive sheets of 9×12 arts and crafts felt work nifty; depending on the size of your pinecones you lot tin can probably get two hats out of each felt sheet. You lot could also use more expensive wool felt if you wish, but I don't think it's necessary.
- White craft pigment + foam paintbrush
- White pom poms
- 1 inch wooden balls or wood beads
You'll also demand a hot mucilage gun. If y'all want to plough your pinecone gnomes into ornaments, you'll as well demand twine or an decoration hanger.

How to make Pinecone Gnomes
These little gnomes are one of my new favorite Christmas crafts. I have simple, step by step instructions for you, as well as a printable didactics bill of fare at the cease of the post.
For your gnomes, the top of the pine cone (the flat side) will exist the lesser of the gnome, which allows them to stand up on a table. The bottom of the pine cone (the pointed side) will point upwards, into the hat. Cull which side of your pinecone will be the forepart. Utilize a foam paintbrush to dab white paint onto the edges of the front of the pinecone in a V-shape to represent a beard.

To make the hat, you need to cut a triangle from 1 corner of your felt. The triangle volition take two straight sides and one curved side. To practice this, fold the felt in half from one corner, then fold it again from that same corner and then it'due south in quarters. Measure down from the corner then cut across the felt in a curve. ***To figure out how far to measure out, use a measuring tape to mensurate around the pinecone where the hat volition sit down. My pinecones were approximately ix inches effectually in bore. Carve up that number past ane.6 to figure out how far downwardly the folded felt to cutting across (that was about five.5 for me; it's not of import to exist exact).***

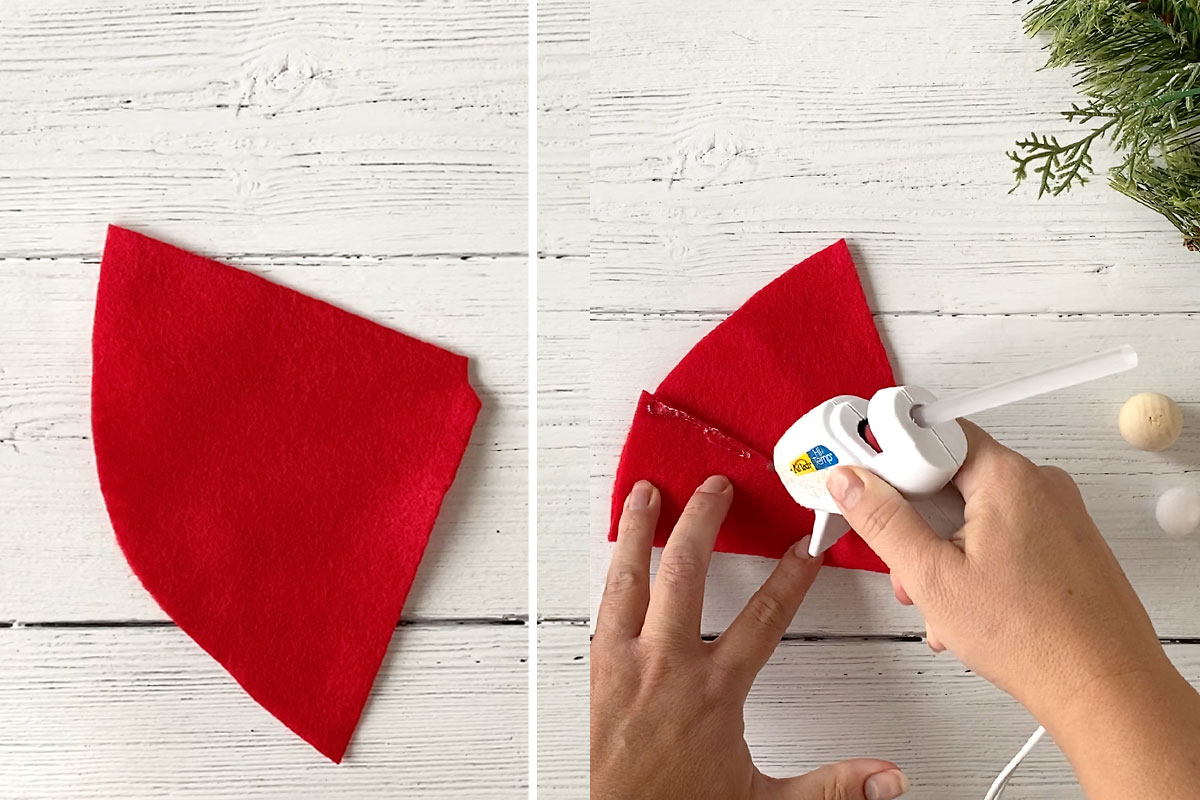
Now you'll have a triangle shape with two direct sides and one curved side. Snip across the corner where the straight sides meet. Fold in one straight side and place a line of hot glue along information technology. Fold in the other direct side to overlap the hot gum. This will create a cone shaped lid. Cheque the size of the hat past placing information technology on the pinecone. If it comes downward besides far or seems too big, trim it a footling forth the bottom. (If you'd like, you lot can also check the size of the hat earlier gluing it together.)
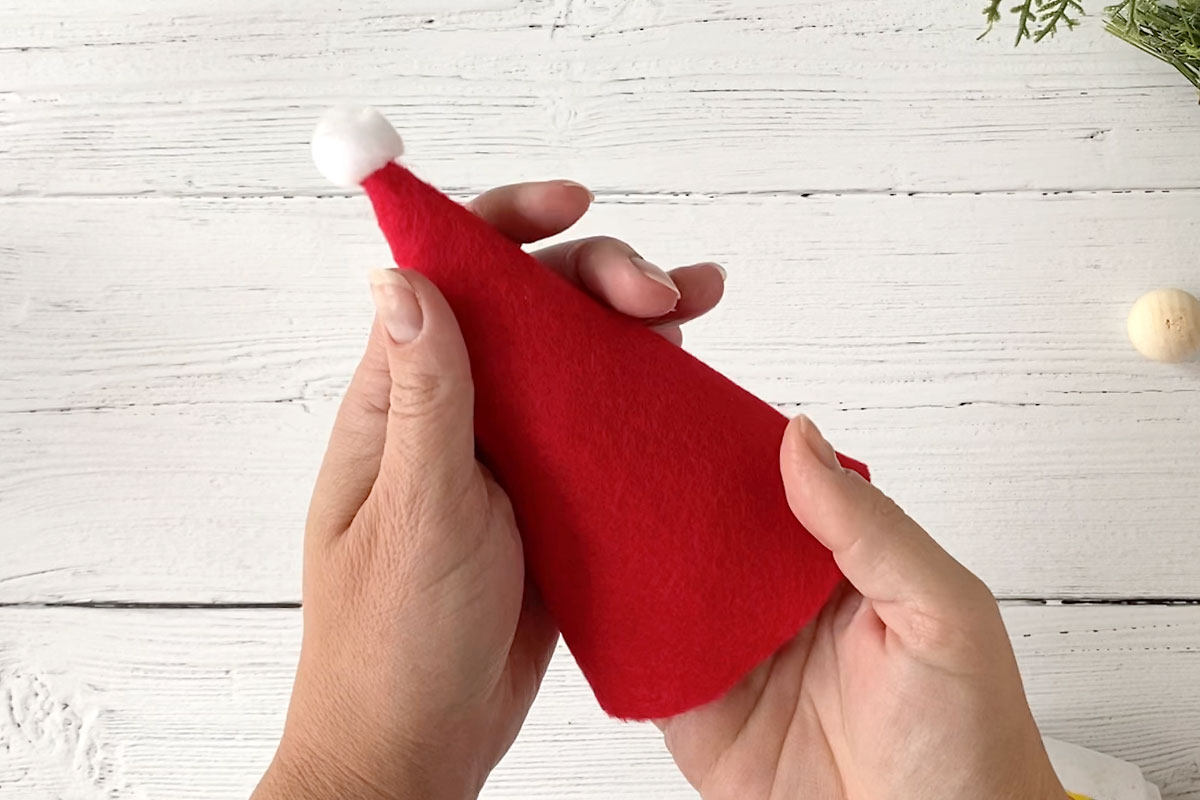
Use hot glue to gum the pom pom to the tip of the lid.
Run a line of hot glue along the lesser edge of the hat in the dorsum, and identify the lid on the pinecone, pressing along where the glue is to secure it. Then figure out where y'all'd like the wood ball to go for the nose. The wooden assurance I used had an opening in the back; sometimes it worked all-time for that opening to go over i of the spikes and sometimes information technology worked best for the ball to go in between spikes. Yous can unremarkably adjust the spikes a lilliputian to make a place for the wood ball to fit. Just figure out what works best for your pinecone, so use hot glue to adhere the wooden ball. The nose should overlap the chapeau. This looks cute and helps secure the hat to the pinecone in the forepart.

That completes your pinecone gnome! If you'd like to turn them into pinecone gnome ornaments, you can glue (or sew together) a loop of twine to the dorsum of the lid, just behind the pom pom.
Learn how to brand adorable pinecones gnomes to use as Christmas ornaments or decorations. This is an easy Christmas arts and crafts that simply takes a few supplies.
- Pinecones
- Arts and crafts Felt, nine×12 inches
- White Acrylic Pigment
- Foam Paintbrush
- White Pom Poms
- Wooden Balls or Wood Beads about 1 inch
- Hot Glue Gun
-
Paint a section on one side of the pinecone white. Just pigment the tips of the pinecone, and paint in Five-shape to mimic the look of a bristles.

-
From one corner, fold the piece of felt into quarters so cut beyond it so make a triangle shape that'south rounded on one side.

-
Cut off the tip of the triangle. Using hot mucilage, attach the two direct sides to form a cone. This will be the hat.

-
Hot glue a pom pom to the top of the chapeau.

-
Hot glue the chapeau to the pinecone. Hot glue a wood ball to the front of the pinecone, overlapping the hat, for a nose.

To turn these gnomes into ornaments, glue or sew together a loop of twine to the top of the hat, right backside the pom pom. Or employ an ornamentation hanger.

Reader Interactions
Source: https://www.itsalwaysautumn.com/diy-pinecone-gnomes.html
0 Response to "DIY Pinecone Gnomes"
Post a Comment